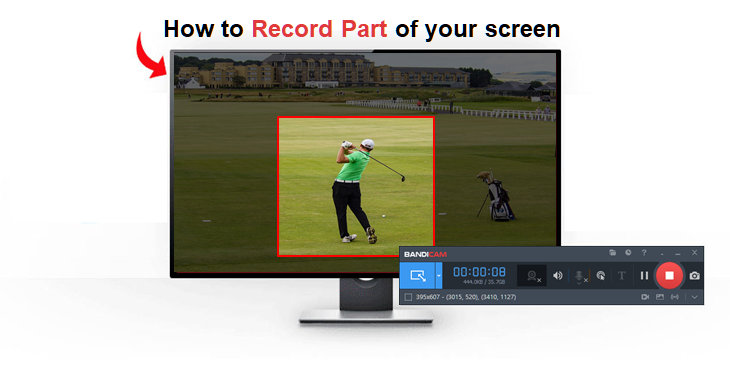
Screen recording has become an essential tool in various fields today due to the increasing shift to digital communication and remote working. In particular, recording part of your screen can be useful in a variety of cases, such as:
- Creating instructional videos: Recording just the relevant part of the screen can make the instructions clearer.
- Webinars: For presentations or webinars, recording a segment of the screen can focus the audience’s attention on the relevant content.
- Feedback and reviews: When reviewing a document or a design, recording the specific part being discussed can provide clear and concise feedback.
- Educational resources: Teachers can record parts of their screen when explaining concepts, which students can then access at their convenience.
- Communication: To avoid misunderstandings that often occur with text-based communication, recording a part of the screen with a voiceover can convey tone and nuance effectively.
If you use Windows 10 or 11, you can use the Xbox Game Bar as a screen recording tool. However, it does not support capturing a specific part of your screen. This limitation can be a hurdle for content creators who require precision in their recordings. As an alternative to Xbox Game Bar, Bandicam allows you to select and record part of your screen on Windows 10 or 11.
In this article, we will introduce three ways to record part of your screen. Choose a method based on your preference to create focused, professional videos.
- Method 1: Record part of screen in a selected window
- Method 2: Record a certain part of your screen
- Method 3: Record around your mouse
How to record part of screen in a selected window
The ‘Specific window‘ option allows you to record only a selected display window. It’s useful for recording video meetings, live streams, or video lectures, as it records only the selected window, excluding what happens on other program windows.
Further, you can record only a specific part of the screen instead of the whole screen. Follow the steps below to record a part of your screen in a selected window:
Step 1: Download and install Bandicam Screen Recorder
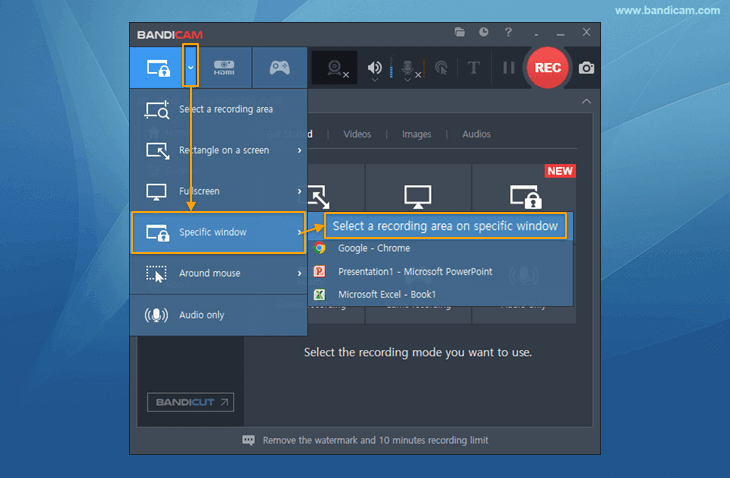
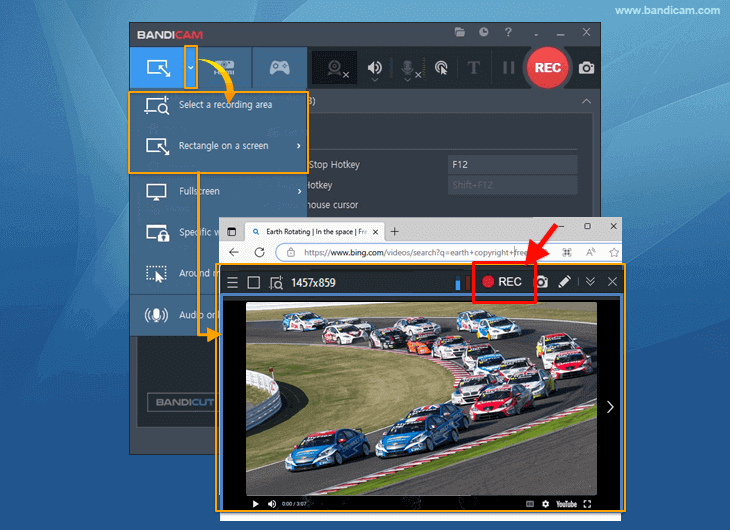
Step 2: Select the ‘Specific window’ mode, and choose the ‘Select a recording area on specific window’ menu.
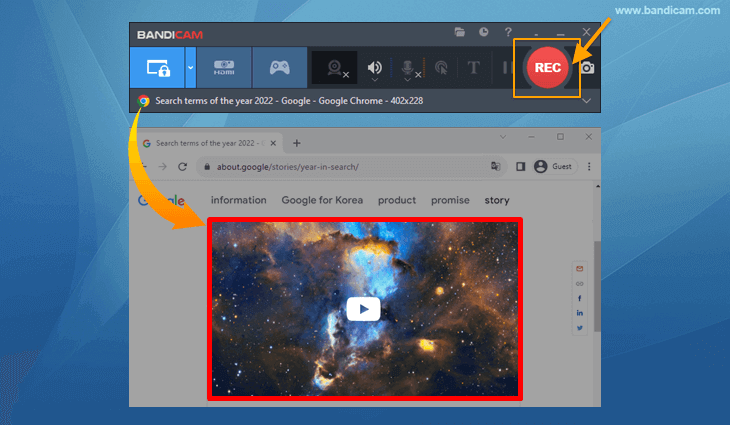
Step 3: Select the recording area in a specific window by dragging with the mouse.
Step 4: Click the ‘● REC‘ button to start/stop the recording.
This method ensures that the recording is limited to the chosen area within the selected window, regardless of any overlay with other program windows that takes place during the recording session.
How to Record a certain part of your screen
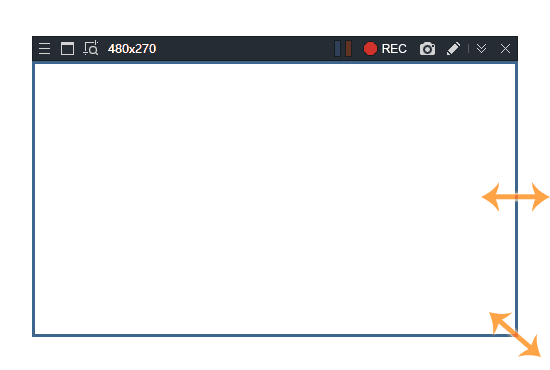
The ‘Rectangle on a screen‘ recording mode allows you to record a specific area by adjusting a rectangular region.
Unlike the ‘specific window’ option, it captures everything visible within the rectangular window, including any popups, windows, or menus that appear over the selected area. It’s ideal for recording part of the screen that doesn’t correspond to a single window.
Step 1: Download Bandicam Screen Recorder and start.
Step 2: Choose the ‘Select a recording area’ or ‘Rectangle on a screen’ menu.
Step 3: Click the ‘● REC‘ button to start/stop the recording.
How to record around your mouse
The ‘Around mouse’ menu captures a specific area surrounding the mouse cursor as it moves across the screen. This is particularly useful for creating content where you want to focus on the actions being performed by the mouse. Here are some examples of how it works:
• Dynamic Area: The recording area dynamically follows the mouse cursor, ensuring that whatever the cursor is interacting with is captured.
• Focus on Detail: It helps viewers concentrate on the cursor’s actions, making it easier to follow along with the steps being shown.
• Customizable Size: Users can adjust the size of the recording area around the mouse, allowing for flexibility depending on the content’s requirements.
• Enhanced Clarity: This mode often comes with additional effects like highlighting clicks or visual cues to indicate mouse activity, enhancing the instructional value of the recording.
Step 1: Start Bandicam and choose the ‘Around mouse’ mode. You can select the recording size you want.
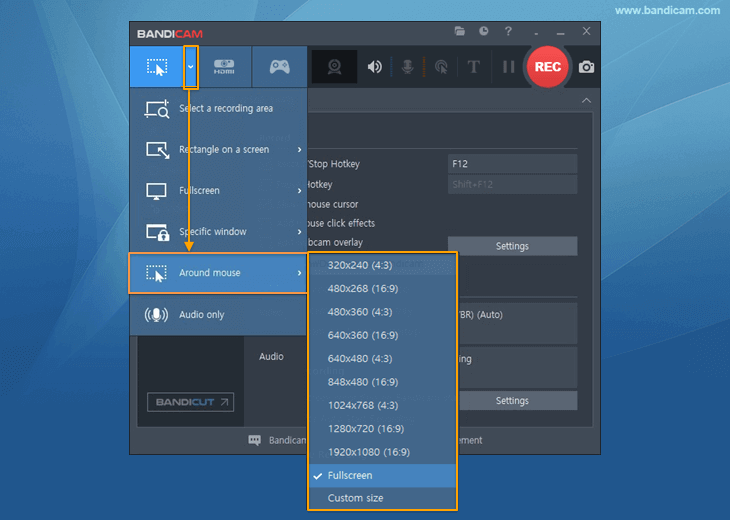
Step 2: You can also add mouse effects, such as recording with the mouse cursor and highlighting the mouse cursor.
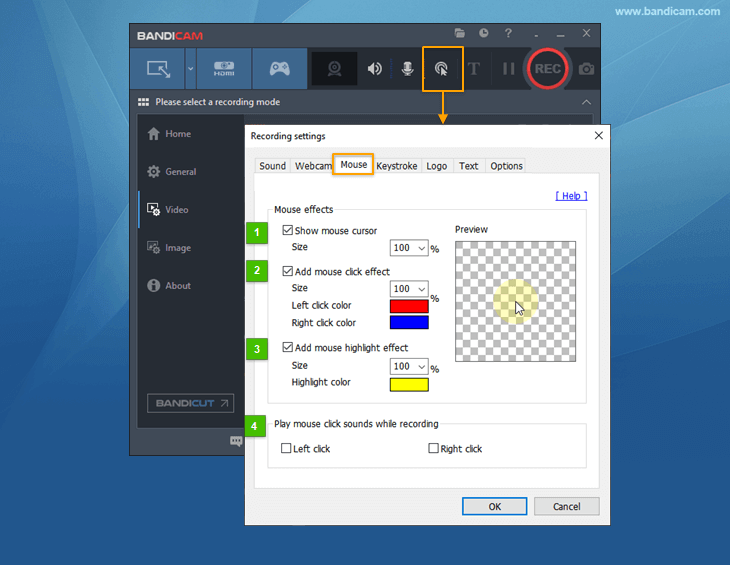
Step 3: Click the ‘● REC‘ button or press the hotkey (F12) to start/stop the recording.

Related FAQs
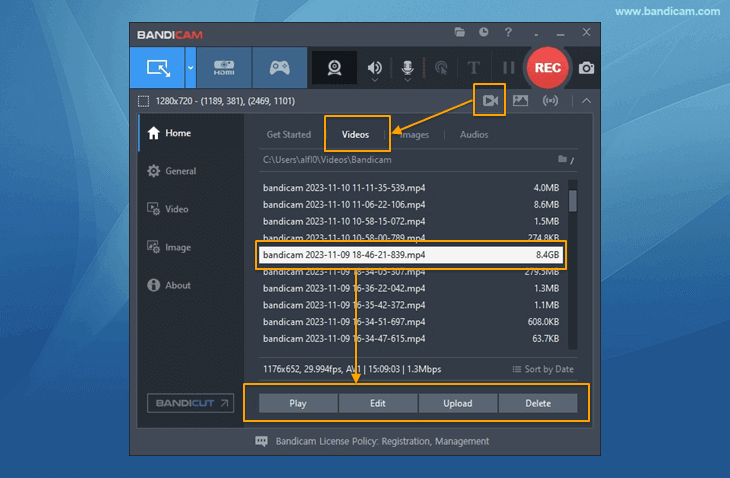
1. Where do I find my recorded video?
If you’ve recorded videos with Bandicam, click on the video icon to check the videos. You can also edit or upload them to YouTube, Google Drive, Vimeo, etc.
2. How do I record a certain part of my screen?
As introduced above, you can record a part of your screen using Bandicam’s recording options, such as ‘Specific window,’ ‘Rectangle on a screen,’ and ‘Around mouse.’
3. How do I record part of my screen with voice?
You can record your screen and voice together by clicking the microphone icon in Bandicam and selecting the microphone device.

Summary
Bandicam offers a variety of screen recording solutions, especially for content creators who need to record a portion of their screen. It offers three recording modes: ‘Specific window’ for capturing an application, ‘Rectangle on screen’ for recording an adjustable area, and ‘Around mouse’ for capturing the center of the dynamic cursor. These features meet a variety of content creation needs, from educational videos and webinars to detailed tutorials, ensuring focused, professional results.